As a corporation deals with challenges and data on a regular basis, the capacity to design systems that can forecast business outcomes becomes critical. By automating sluggish procedures and incorporating intelligence in your IT systems, you can solve problems and move more quickly.
But how can you ensure that all teams and individual decision-makers within the company have the authority to build these ML systems at scale without relying on other data science and data engineering teams? Amazon SageMaker Canvas is the answer, one of the most noteworthy announcements at re:Invent 2021. This launch simplifies AI creation by eliminating the requirement for users to write any code. It also doesn’t need a thorough understanding of machine learning.
Amazon SageMaker Canvas uses the same technology as Amazon SageMaker to automate the process of cleaning and combining the code, creating hundreds of models, selecting the one with the best performance, and finally generating new individual or batch predictions. The supported problem types include binary classification, numerical regression, multi-class classification, and time series forecasting. Such problem types help the users to deal with business-critical use cases like churn reduction, fraud detection, inventory optimization, etc. without the need of writing huge chunks of code.
Using Amazon SageMaker canvas reduces the hardware costs and maintains the underlying infrastructure cost to the bare minimum. Amazon SageMaker Canvas comes with in-built cybersecurity flexibility and compliance features that eliminate the need to have it implemented from scratch. In this blog, we will have a look at how we can build machine learning models to generate the best accurate predictions without writing code using Amazon SageMaker.
Hands-on

In this hands-on, we will see how we can build ML models to generate accurate predictions without writing code using Amazon SageMaker Canvas.
Navigate to the AWS dashboard, we will first navigate to the Amazon SageMaker console and check if the selected region supports the canvas domain. If not, we’ll change the selected region. Post that, we will navigate to the Canvas option and set up a new domain.
We will create a new role for the newly created domain and select a VPC and a subnet for the same domain. Post creation of a domain, we will launch the application using the Canvas option. We will then have a look at the various steps required to build the model and begin with predictions. Navigating to the S3 bucket, we will add a dataset inside the bucket.
We will then alter the CORS policy for the same bucket. On the canvas dashboard, we will then navigate to the dataset section and select the dataset uploaded inside the S3 bucket. Once the dataset is imported, we will navigate to the Models section and create a new model. Creating a new model, we will select the dataset for which we wish to perform predictions.
We will then navigate to the Build step of the model creation process. Selecting a target column, we will preview the model to have a rough look at the analysis and the value distribution for the various columns in the dataset. Post that, we will create a Model via the Quick Build option.
Post the model creation, we will navigate to the analyze tab and have a look at the analysis output as well as the various graphs plotted in terms of value distribution for various columns in the dataset. Then we will finally have a look at the Scoring graph and make the dataset ready for predictions.
To implement the same, we will do the following:
- Log in and navigate to the AWS console.
- Navigate to the Amazon SageMaker console.
- Check if the selected region supports the Canvas domain. If not, change the region.
- Navigate to the domain dashboard and set up a SageMaker Domain.
- Create a new role for the newly created domain.
- Select a VPC and a subnet for the domain.
- Once the domain is created, launch the app in Canvas mode.
- On the canvas dashboard, navigate to the Help feature and explore the various steps of performing the predictions.
- Navigate to the datasets dashboard on the Canvas dashboard and select a dataset.
- Enter the S3 dashboard and search for a specific bucket.
- Upload the dataset inside the bucket.
- Navigate to the bucket permissions and alter the CORS policy.
- Navigate back to the SageMaker canvas dashboard and select the bucket that consists of the dataset.
- Import the dataset that exists inside the bucket.
- Navigate to the Models tab and create a new model.
- Select a dataset to perform predictions on.
- Enter the build stage and select a target column.
- Preview the model and have a look at the results as well as the value distributions for each column.
- Quickly build the model and post the creation, enter the analyze section and have a look at the analysis output as well as the various graphs.
- Have a look at the Scoring graph and finally, make the dataset ready for predictions.
Log in and navigate to the AWS dashboard.

Search for Sagemaker Canvas or just Sagemaker and navigate to the service dashboard.

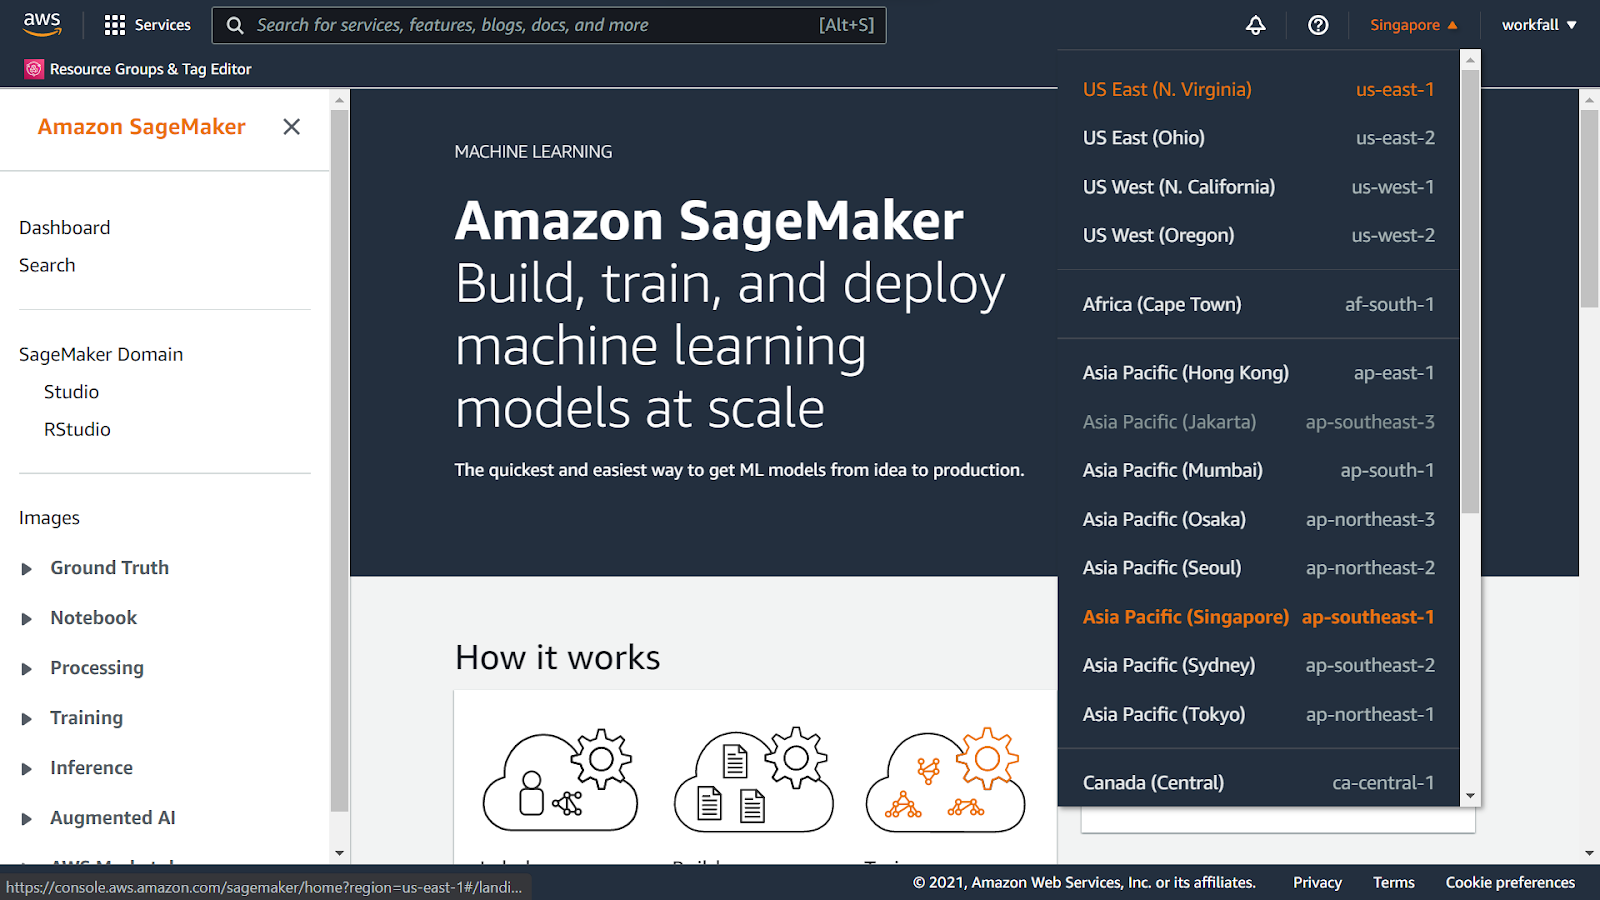
Under SageMaker Domain in the left navigation pane, check if Canvas is available for the selected region. If it’s not, change the region to the region that supports the SageMaker Canvas domain.
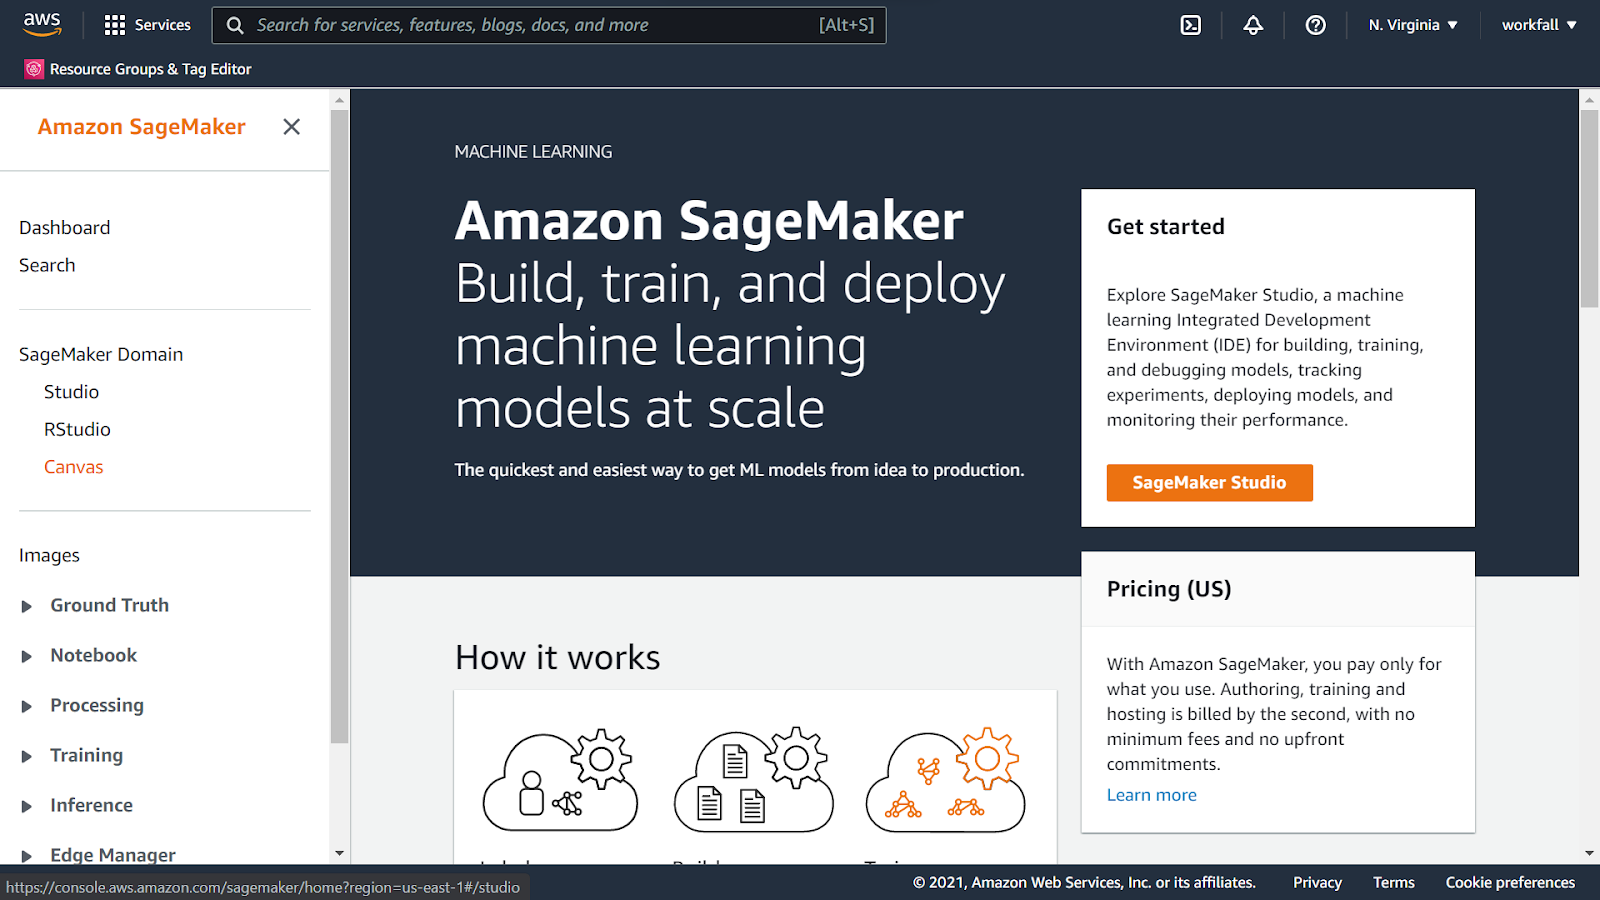
Now, you can see that the Canvas domain is available under the SageMaker domain.

Select the Canvas domain and click on it to open the domain dashboard.
Select the Quick Setup option to quickly get started with SageMaker Canvas. You can edit the name of the user under the User profile section.

Under the SageMaker role, select Create a new role.

In the opened modal, either select a specific bucket or select any bucket. Click on create role.

On success, you will see a new role created. You can cross-verify by navigating to the IAM console. Click on Submit.

Select a VPC in which you wish to configure the canvas. Select a subnet in that VPC. Click on Save and continue.

The creation might take a few minutes.

On success, you will see the message as shown in the image below. Click on the Launch app dropdown.

Select canvas from the dropdown.

A new window will open up opening the Amazon SageMaker Canvas dashboard. The creation might take a few minutes.

On success, you will see the dashboard as shown in the image below. Click on the Help (?) symbol.
This shows a quick walkthrough as to how we can get started. Click on Continue.

The first step shows how we can import data and execute join operations if multiple datasets are imported. Click on Build Model.

The next step shows how we can build a model choosing a target type and a model type. Click on Analyze results.
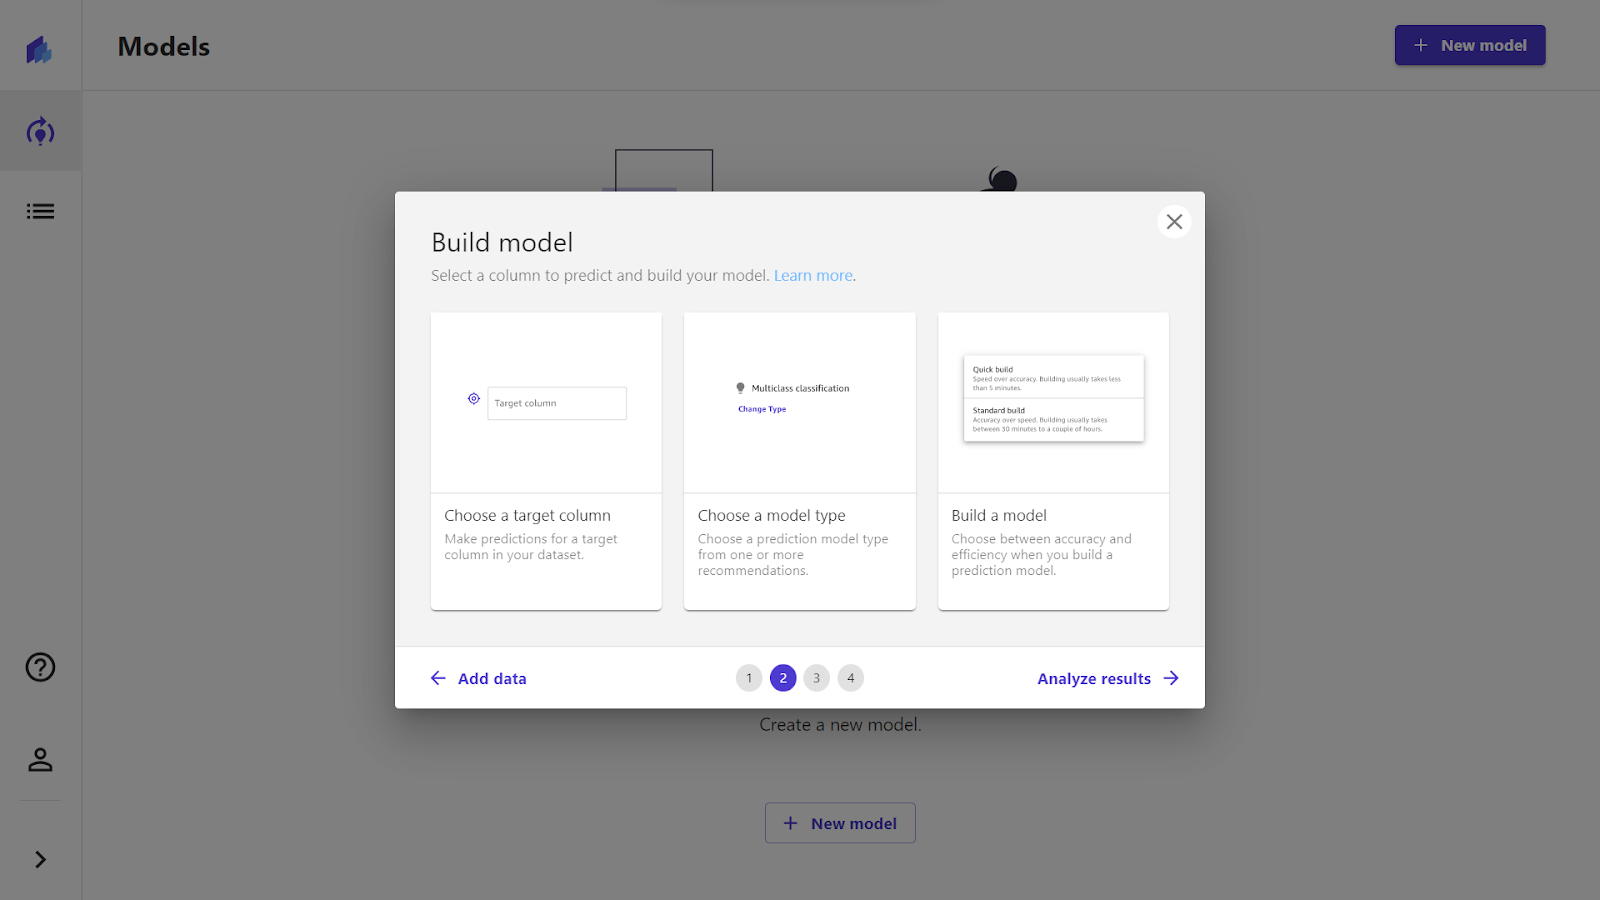
The next step shows how we can analyze the final result outputted by the model created above. Click on Generate predictions.
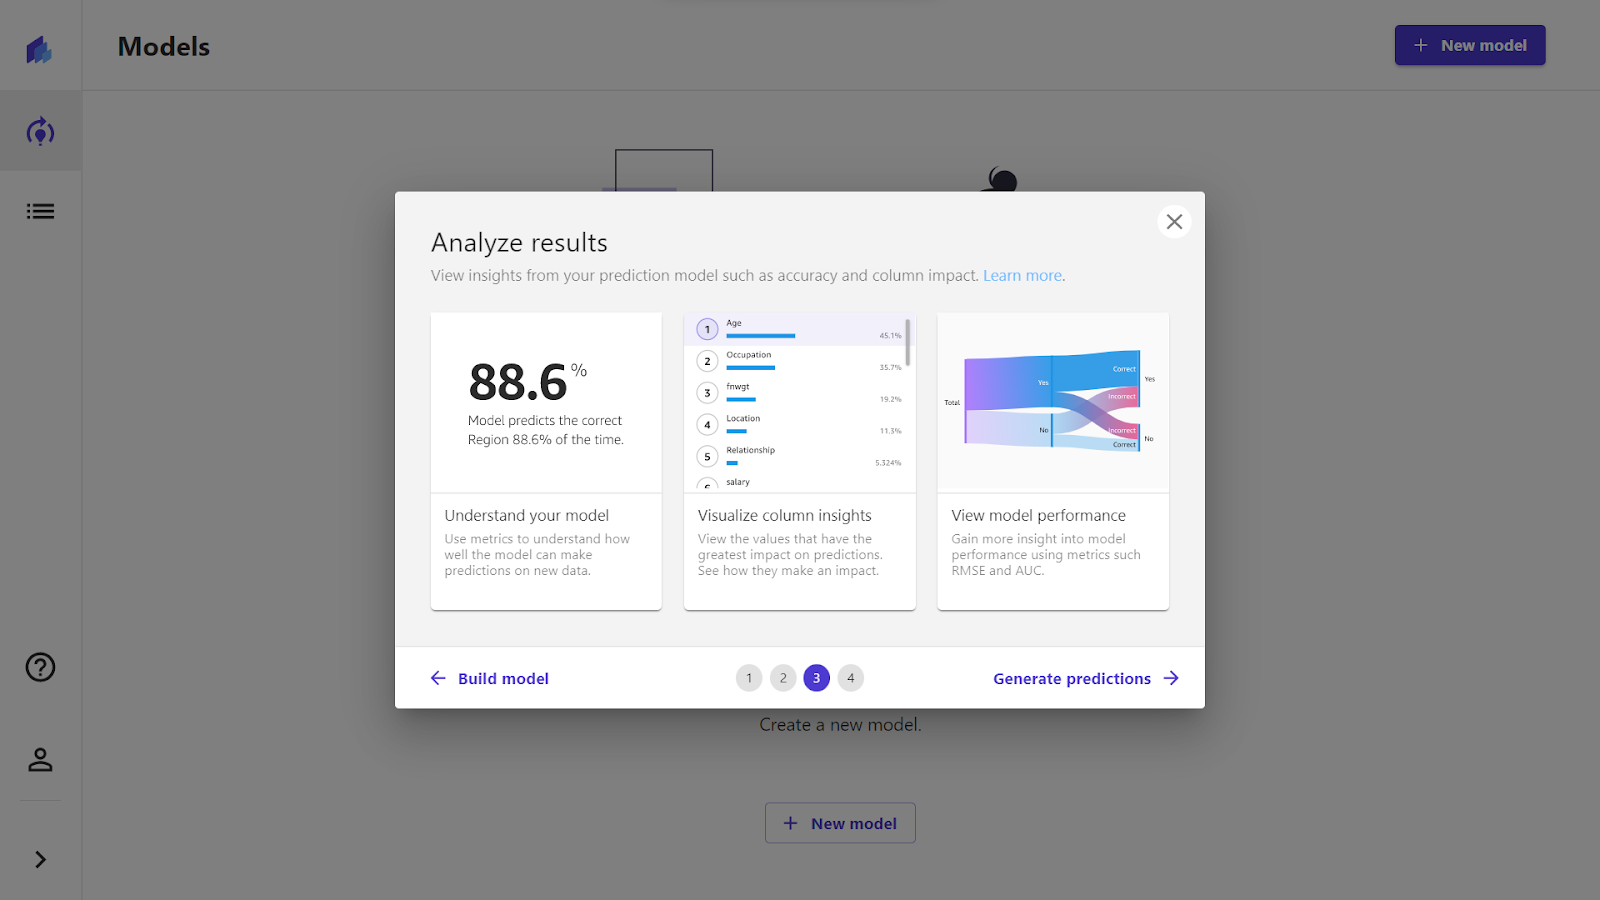
The next step shows how we can perform prediction operations on the created model. Click on FInish.

Select Datasets from the left navigation pane. Click on Import.

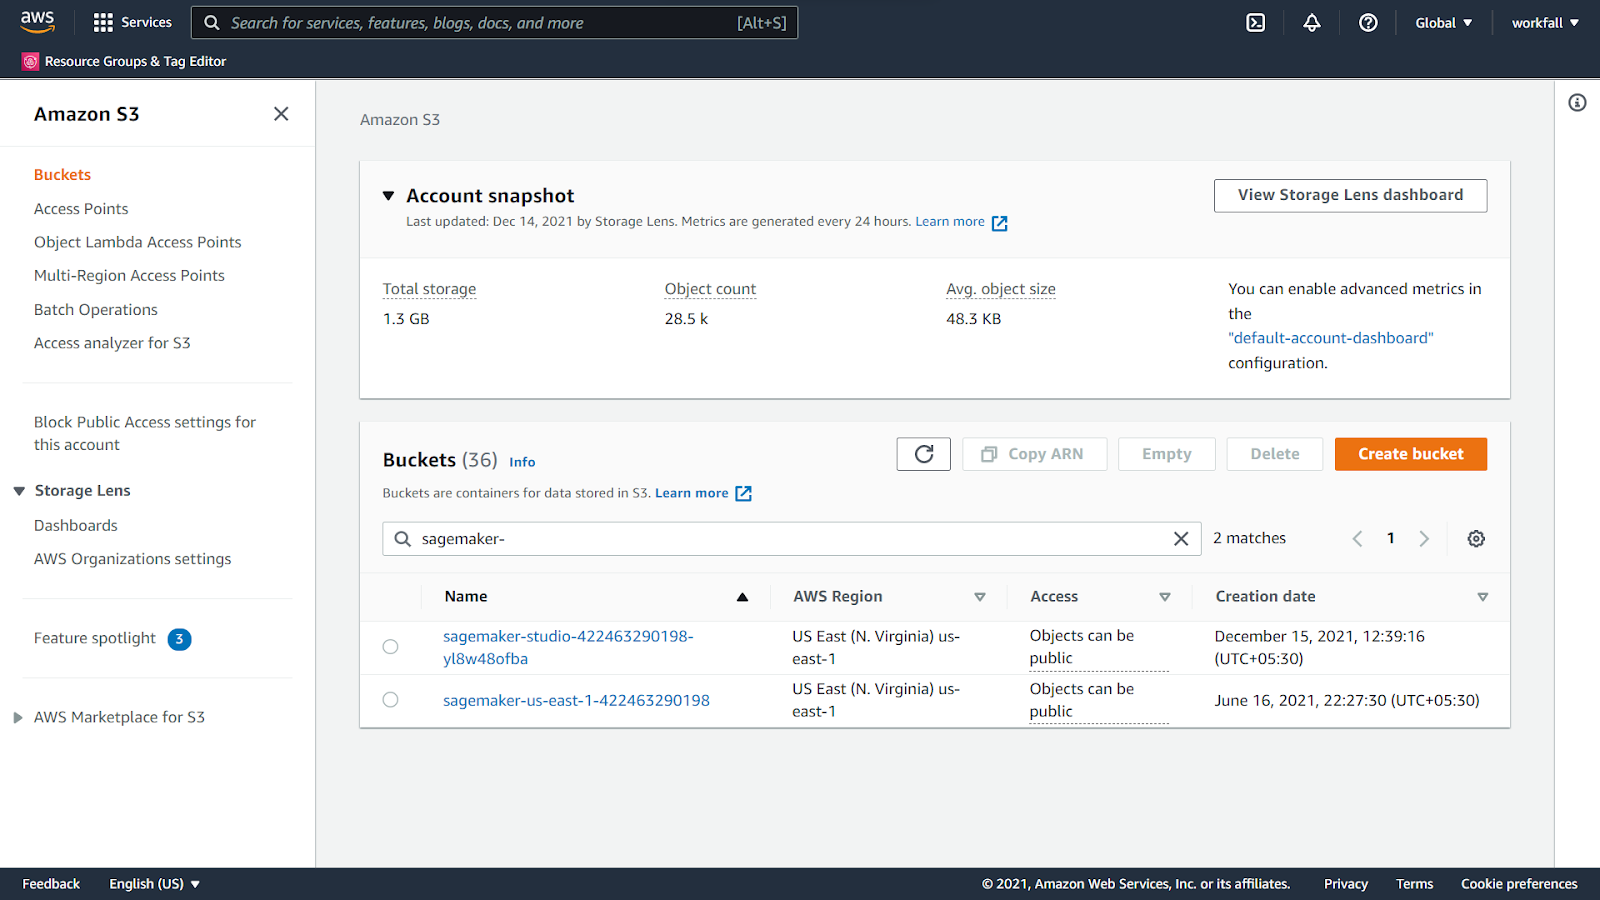
Select the S3 tab and in the search bar search for the S3 bucket that consists of the file.

Navigate to the S3 bucket dashboard and search for the sagemaker-(some id) bucket that was created automatically while performing the configurations.
Upload a CSV dataset file in the bucket. We have used the Supply Chain Logistics Problem dataset from the link below.
https://brunel.figshare.com/articles/dataset/Supply_Chain_Logistics_Problem_Dataset/7558679
Once you convert the downloaded file in CSV format and upload it in the bucket, click on Upload.

On success, you will see the message as shown in the image below.

Now, in your bucket, you’ll get to see the new file uploaded. Navigate to the Permissions tab.

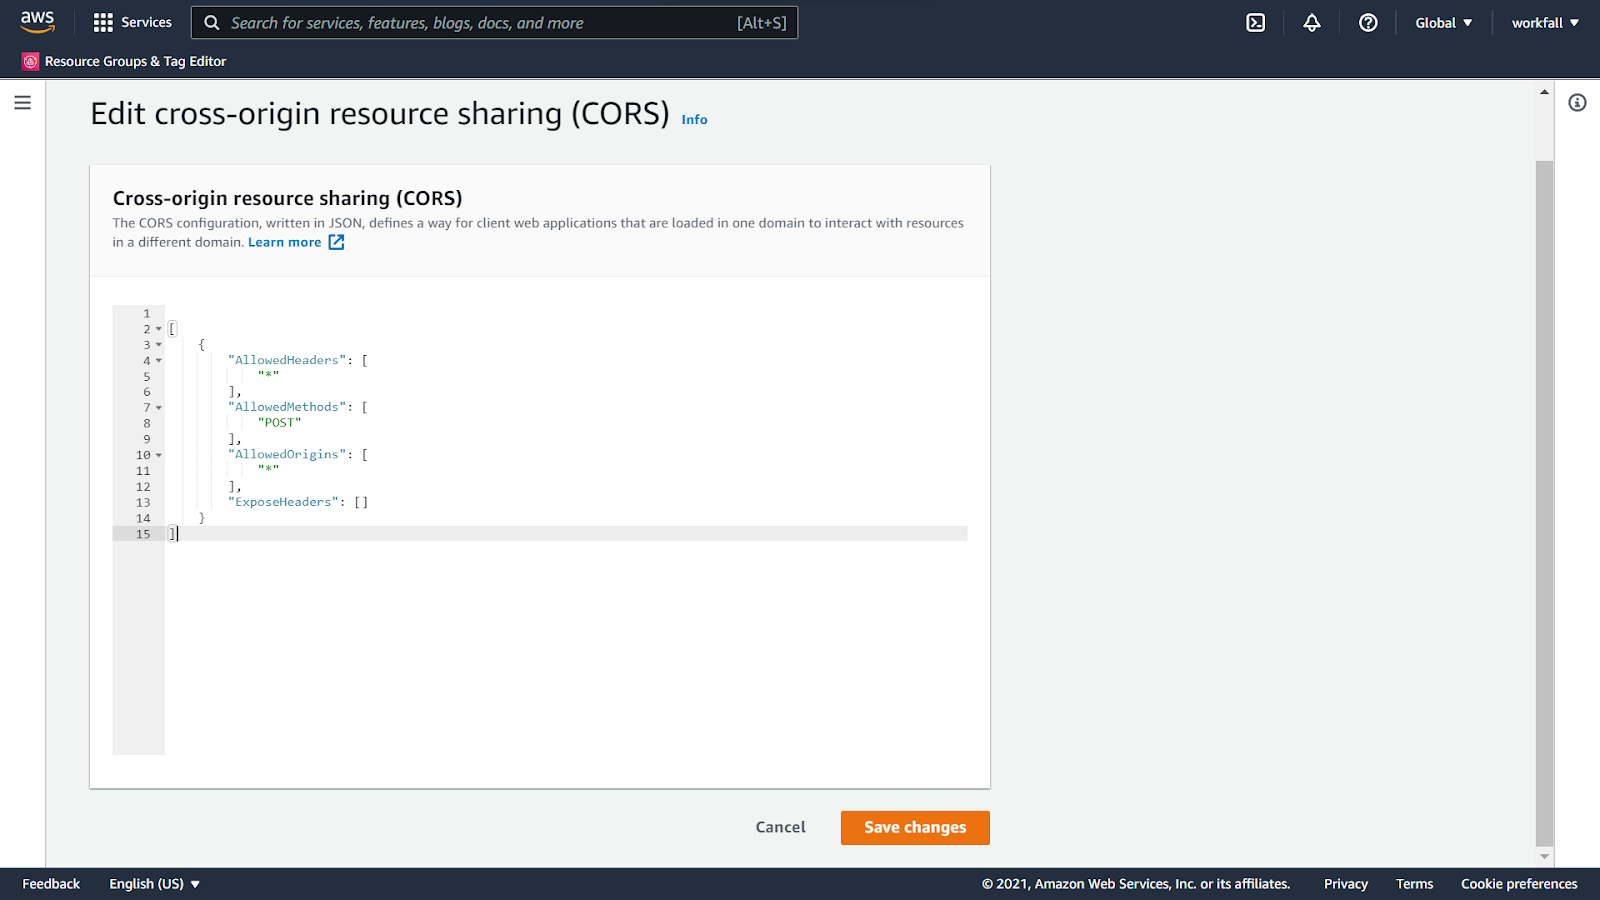
Scroll down to the bottom of the CORS configuration.

Copy the below configuration and add it to the CORS configuration.
[
    {
        "AllowedHeaders": [
            "*"
        ],
        "AllowedMethods": [
            "POST"
        ],
        "AllowedOrigins": [
            "*"
        ],
        "ExposeHeaders": []
    }
]
Click on Save Changes.
On success, you will see a message as shown in the image below.

Navigate back to the canvas dashboard and search for the bucket in the S3 tab. Open the bucket.

Select the dataset that we uploaded above in the S3 bucket. Click on Import data. To have a preview for the same, click on Preview all.

Have a look at the dataset structure. Click on Import data.

Processing the dataset and making it ready might take some time based on the size of the dataset.

Once the status changes to ready, click on the dataset to view the data.

Confirm the structure of the dataset.

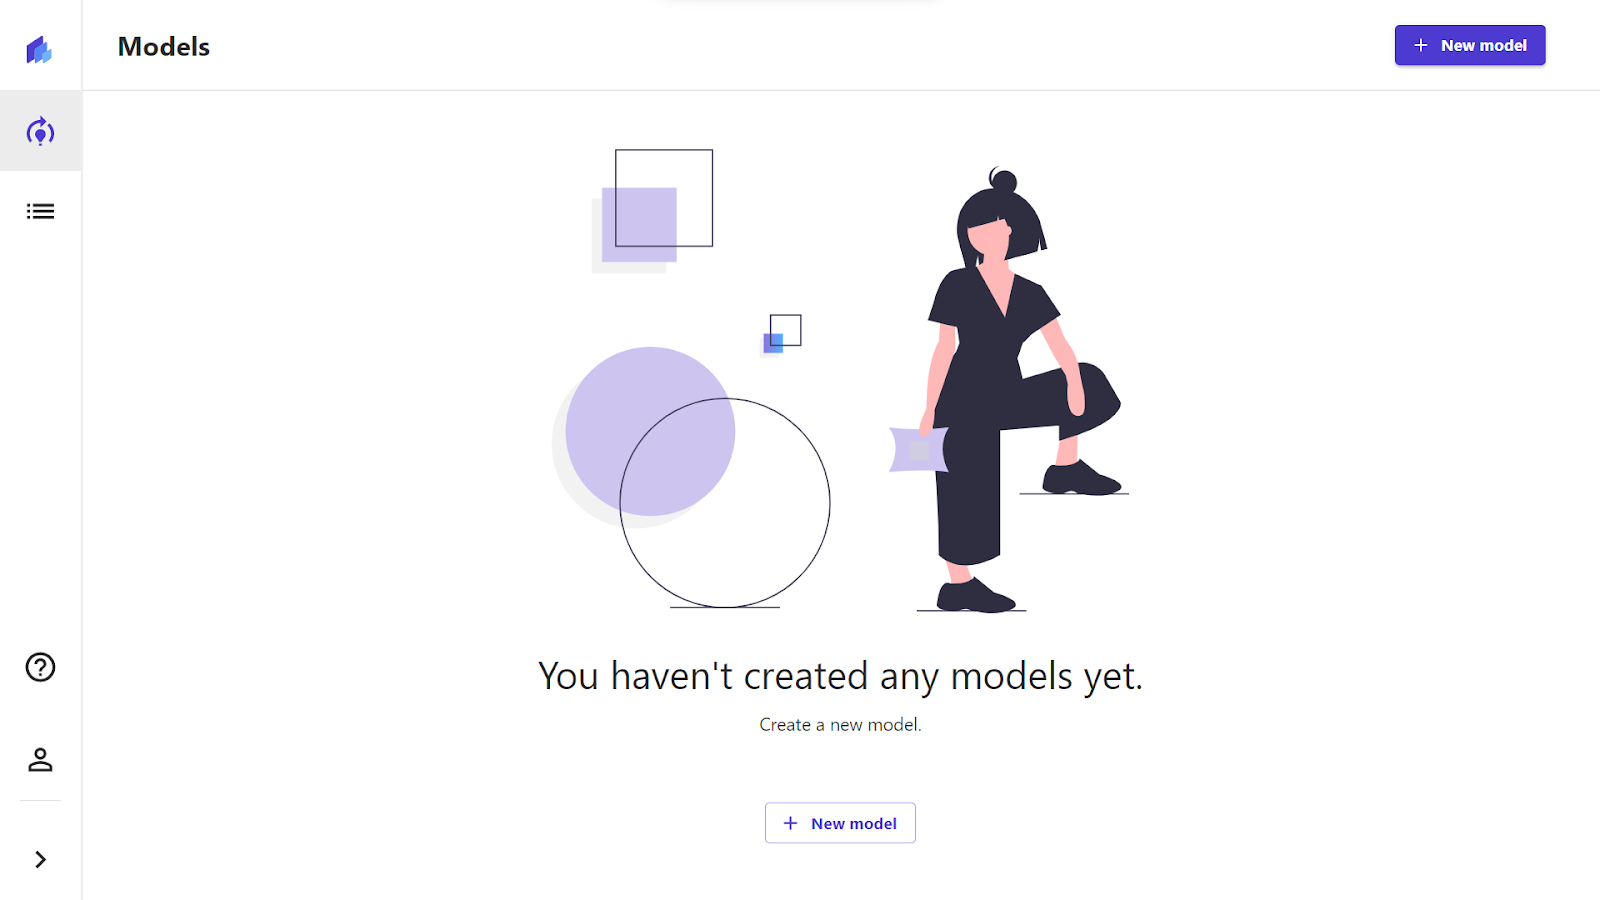
Navigate to the Models section on the canvas dashboard. Click on New model.

Enter a name for the model and click on Create.

Select the dataset that you uploaded above. Click on Select dataset.

You’ll see the second stage to build the model. You can eliminate certain columns from your prediction model as well as select a target column to perform the analysis on.

Uncheck a column that is not to be included in the analysis.

Select a target column from the dropdown.
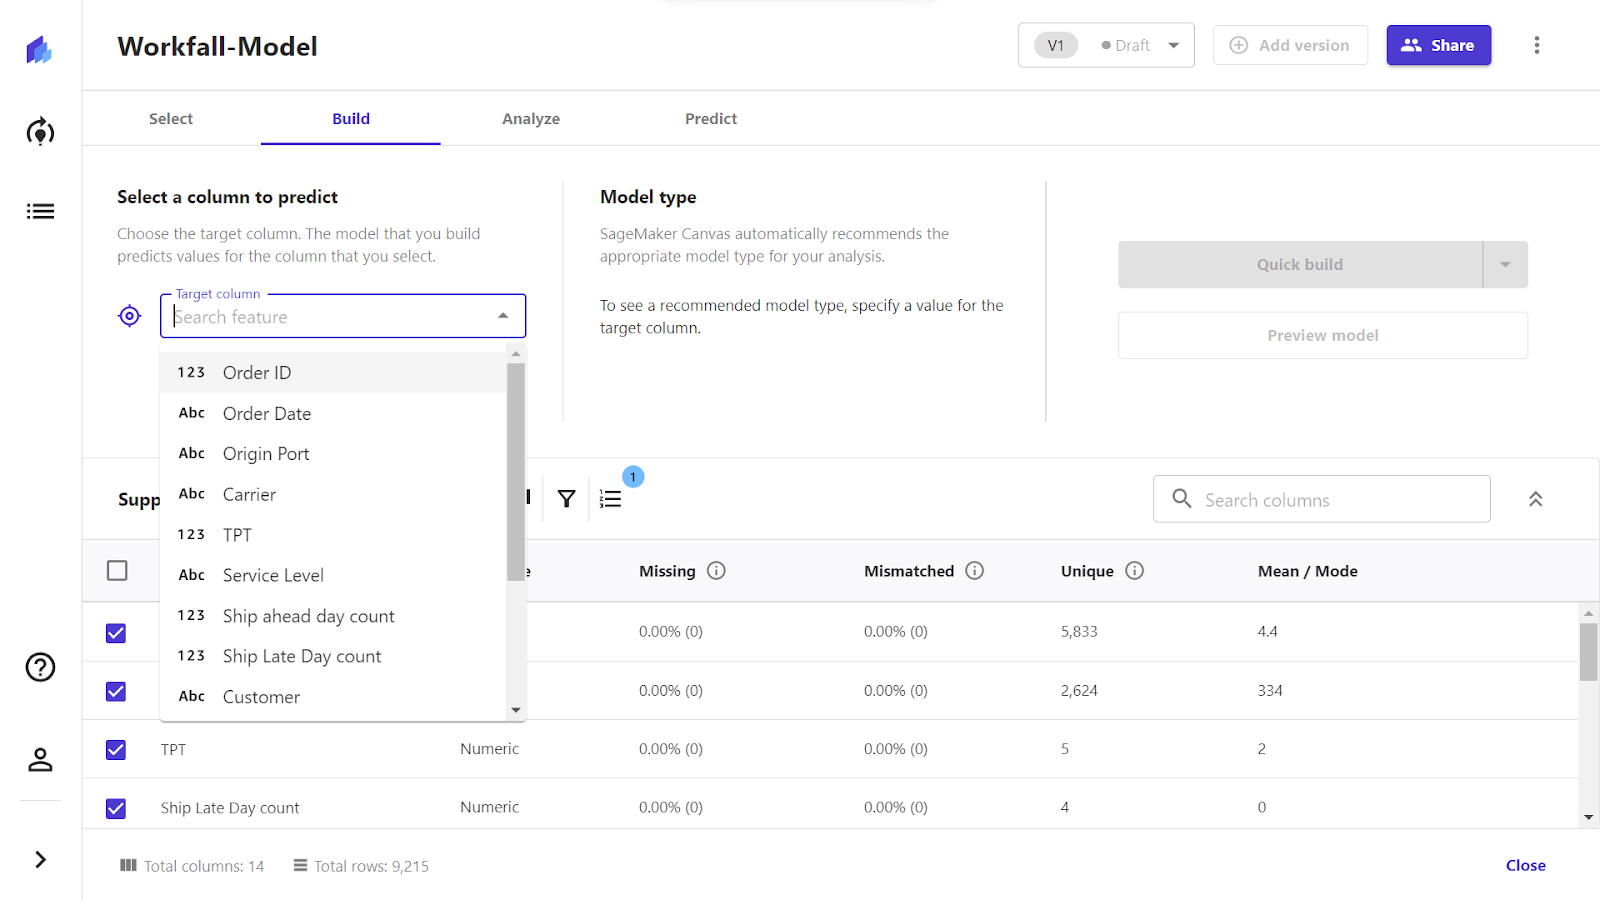
Selecting a column will display a value distribution graph below the input box.

Click on the Preview model. A new modal will appear with the details of the model.

Scrolling down the list, you’ll see the value distribution for each of the columns Click on the Quick Build model dropdown and select Quick Build.

The model creation might take a few minutes.

On success, you’ll see the results and the model status. The column impact shows the impact on the model output in terms of value distribution.
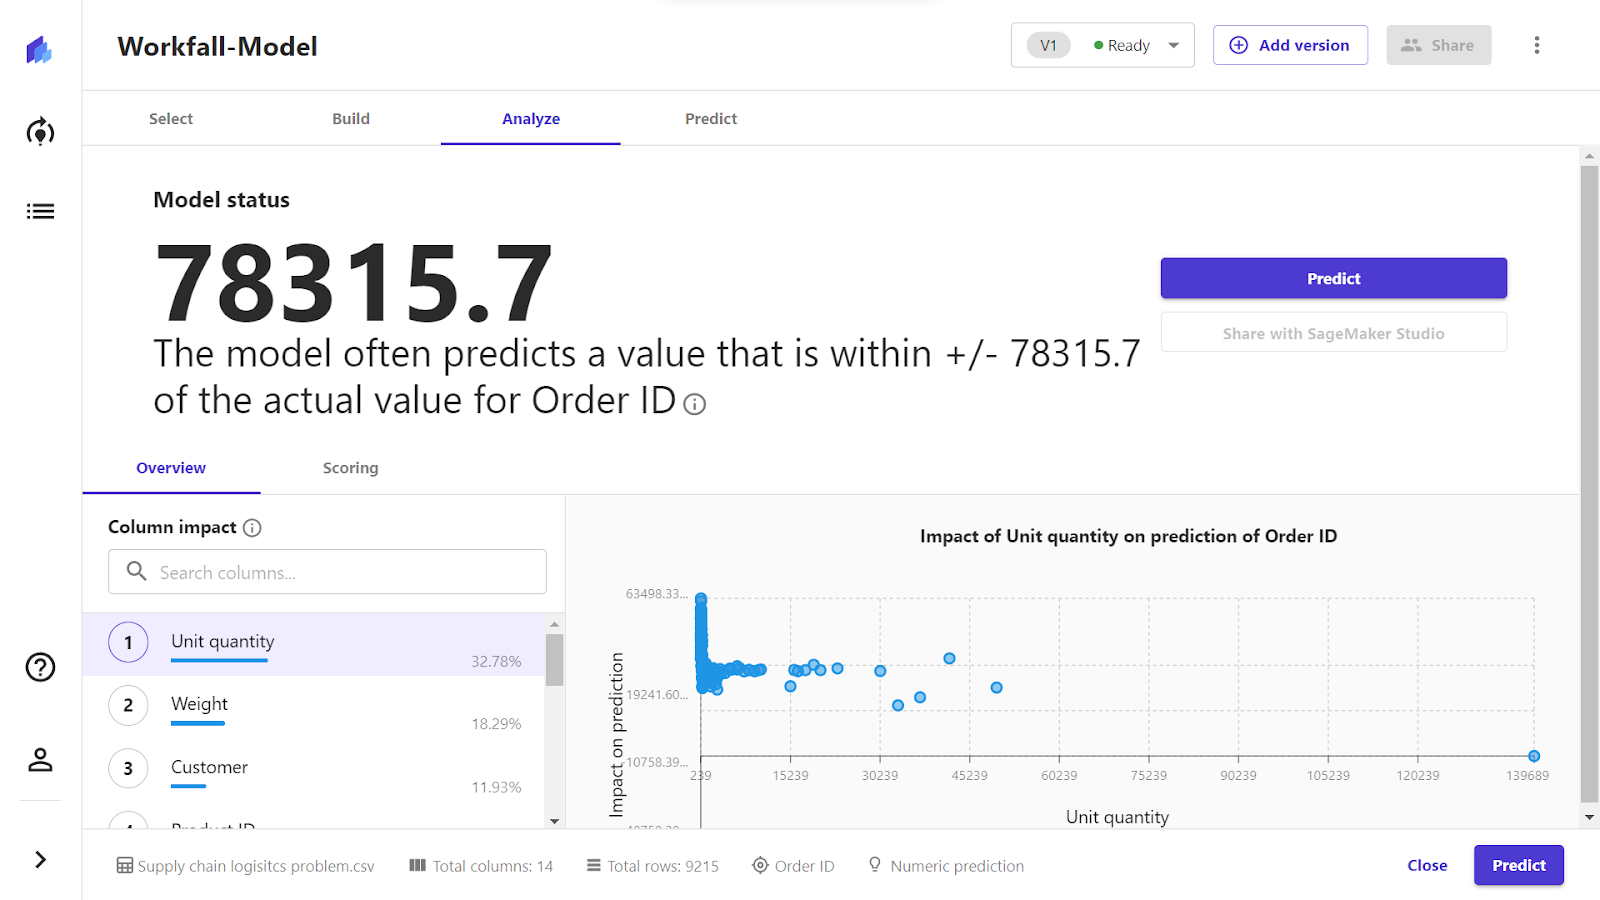
Select the different columns to check the impact for each.

Click on the Scoring tab to have a look at the scoring graph to perform analysis. Finally, click on Predict.

Click on Select dataset to select a new dataset.

It might take a few minutes to generate predictions.

On success, you have the final dataset on which you can perform the required predictions on the Canvas dashboard.

Companies using Amazon SageMaker Canvas

Conclusion
In this hands-on, we saw how we can build ML models to generate accurate predictions without writing code using Amazon SageMaker Canvas. Navigating to the AWS dashboard, we first navigated to the Amazon SageMaker console and checked if the selected region supports the canvas domain. If not, we then changed the selected region.
Post that, we navigated to the Canvas option and set up a new domain. We created a new role for the newly created domain and selected a VPC and a subnet for the same domain. Post creation of a domain, we launched the application using the Canvas option. We then had a look at the various steps required to build the model and begin with predictions.
Navigating to the S3 bucket, we added a dataset inside the bucket. We then altered the CORS policy for the same bucket. On the canvas dashboard, we then navigated to the dataset section and selected the dataset uploaded inside the S3 bucket.
Once the dataset was imported, we navigated to the Models section and created a new model. Creating a new model, we selected the dataset for which we wish to perform predictions. We then navigated to the Build step of the model creation process. Selecting a target column, we had a look at the model preview to have a rough look at the analysis and the value distribution for the various columns in the dataset.
Post that, we created a Model via the Quick Build option. Post the model creation, we navigated to the analyze tab and had a look at the analysis output as well as the various graphs plotted in terms of value distribution for various columns in the dataset. Then we finally had a look at the Scoring graph and made the dataset ready for predictions.
We will discuss more use cases for the services used in our upcoming blogs. Stay tuned to keep getting all updates about our upcoming new blogs on AWS and relevant technologies.
Meanwhile …
Keep Exploring -> Keep Learning -> Keep Mastering
This blog is part of our effort towards building a knowledgeable and kick-ass tech community. At Workfall, we strive to provide the best tech and pay opportunities to AWS-certified talents. If you’re looking to work with global clients, build kick-ass products while making big bucks doing so, give it a shot at workfall.com/partner today.